




Choosing the right heat shrink tubing size comes down to two numbers: the expanded inside diameter (ID) must be large enough to slide over the largest part of your component, and the recovered inside diameter must be small enough to clamp down tightly once shrunk. A practical rule for most wire harness and cable assembly work is to select tubing whose expanded ID is 20–30% larger than the widest point of the part, and whose fully recovered ID is 10–20% smaller than the smallest diameter you need to seal. Get those two numbers right and the shrink ratio simply tells you how much range a single tube can cover.
How Heat Shrink Tubing Sizes Are Measured
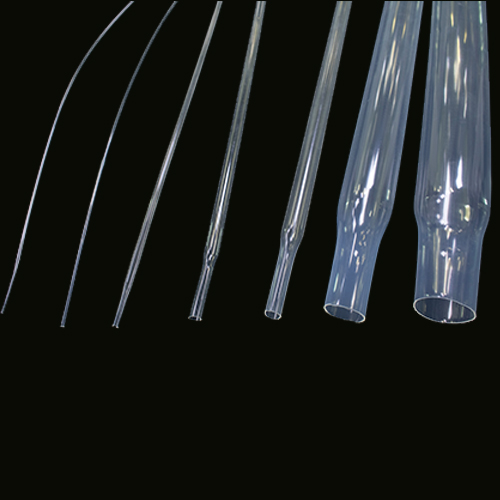
Heat shrink tubing sizes are always quoted as a pair, never as a single number. The first figure is the as-supplied (expanded) ID — the bore you have to work with before heating. The second is the fully recovered ID — the bore after the tubing has been heated to its shrink temperature and allowed to contract completely. A tube listed as "6.4 mm / 3.2 mm" therefore starts at a 6.4 mm bore and finishes at 3.2 mm.
Two more dimensions matter in practice. Wall thickness determines mechanical and dielectric protection — thin-wall tubing is used where space is tight, heavy-wall where abrasion or voltage stress is severe. Supplied length is usually a continuous reel or cut length, and for most industrial buyers both wall thickness and cut length are customisable rather than fixed catalogue values.
What Shrink Ratio Means (2:1 vs 3:1 vs 4:1)
The heat shrink tubing shrink ratio is the expanded ID divided by the recovered ID. It tells you how much size variation one tube can absorb, and it is the single biggest factor in how many part numbers you need to stock.
| Shrink ratio | Example (expanded → recovered) | Size range covered | Typical use |
|---|---|---|---|
| 1.6:1 | 2.0 mm → 1.25 mm | Narrow | Fluoropolymer Tubing (FEP) where the fit must be tight and low-profile, such as medical catheters |
| 2:1 | 6.4 mm → 3.2 mm | Standard | General wire and cable insulation, silicone and PTFE Heat Shrink Tubing, harness repair |
| 3:1 | 9.0 mm → 3.0 mm | Wide | Connectors and splices where the tubing must pass over a bulky body and then shrink onto a thin cable |
| 4:1 | 12.0 mm → 3.0 mm | Widest | Multi-branch harness breakouts, irregular shapes, and stocked tubing intended to replace several sizes |
The 2:1 vs 3:1 heat shrink tubing decision is mostly about connector clearance. If the tubing has to slide over a plug, lug or sensor housing that is far wider than the cable behind it, a 2:1 tube large enough to clear the housing will not recover tightly enough onto the cable. A 3:1 heat shrink tubing size handles that transition in one piece and avoids stacking two sizes. A 4:1 tube is worth specifying when you want to consolidate inventory — one 4:1 size can often replace three 2:1 sizes, which simplifies kitting and reduces the risk of an operator picking the wrong reel.
How to Measure a Component and Select a Size
Step 1 — Measure the largest point the tubing must pass over
Use a caliper on the widest rigid feature, not the cable bundle. On a terminated harness this is usually the connector body, a ring terminal, or a splice. Add 20–30% to that measurement to get the minimum expanded ID you can use.
Step 2 — Measure the smallest point the tubing must seal onto
This is the conductor, cable jacket or splice barrel underneath. The recovered ID should land 10–20% below this figure so the tubing grips with real hoop tension instead of sitting loose.
Step 3 — Pick the ratio that spans both numbers
Divide your Step 1 minimum expanded ID by your Step 2 maximum recovered ID. If the result is under 2, a 2:1 tube works. Between 2 and 3, specify 3:1. Above 3, go to 4:1 — or split the assembly into two operations with two sizes.
Step 4 — Confirm the recovered wall thickness
Wall thickness is quoted at full recovery. Because the wall thickens as the tube shrinks, a partially recovered tube gives you less protection than the datasheet value. Specify the wall you need after recovery, not the supplied wall.
Heat Shrink Tubing Size Chart
The table below lists the standard expanded and recovered diameters you will see quoted across most supplier catalogues, with the nearest imperial equivalent. Use it to convert between the metric and inch references that different drawings and BOMs use — a common source of ordering errors.
| Expanded ID (mm) | Recovered ID at 2:1 (mm) | Nearest imperial size | Typical cable / wire use |
|---|---|---|---|
| 1.6 | 0.8 | 1/16" | Fine sensor leads, thermocouple wire |
| 2.4 | 1.2 | 3/32" | Hook-up wire, thin control cable |
| 3.2 | 1.6 | 1/8" | Small-diameter signal and instrumentation cable |
| 4.8 | 2.4 | 3/16" | General-purpose wiring and splice insulation |
| 6.4 | 3.2 | 1/4" | Automotive and industrial control cable |
| 9.5 | 4.8 | 3/8" | Multi-core cable, small harness breakouts |
| 12.7 | 6.4 | 1/2" | Battery cable, heavy control leads |
| 19.1 | 9.5 | 3/4" | Power cable and lug insulation |
| 25.4 | 12.7 | 1" | Large power and EV high-voltage cable |
| 38.1 | 19.1 | 1-1/2" | Heavy cable joints and busbar insulation |
| 50.8 | 25.4 | 2" | Cable terminations and large splices |
This heat shrink size chart assumes a 2:1 ratio. For a 3:1 tube the recovered ID is one third of the expanded figure, and for 4:1 it is one quarter — so a 12 mm 4:1 tube recovers to 3 mm. Always confirm the recovered dimension against the manufacturer datasheet rather than assuming the ratio, because wall thickness and material both affect how far a specific tube actually recovers.
Large Diameter Heat Shrink Tubing
Large heat shrink tubing covers the sizes from roughly 25 mm upward, and large diameter heat shrink tubing behaves differently from small tubing in two ways that affect sizing. First, shrinkage is less uniform around a very large circumference, so recovery is usually quoted more conservatively and the achievable ratio for a single tube is often closer to 2:1 than 3:1. Second, the heat required scales with mass — a 50 mm tube needs both a higher airflow and a longer dwell time than a 6 mm tube, which means the ends can recover before the centre if you rush the job.
For large diameter work, size to the lower end of the 20–30% clearance rule and use a controlled heat source rather than an open flame. If you need a wide size range at large diameters, specifying a heavy-wall 3:1 tube is usually a better answer than ordering several 2:1 sizes, because the recovered wall stays thick enough for insulation duty. Our heat shrinkable tube range is produced from 1.6 mm up to large-diameter bore, and non-standard bores are made to order.
Matching Size to Material and Temperature Range
Size and material are not independent choices. Each material has a natural shrink ratio and a shrink temperature, and the size you can specify is limited by what the material will actually do.
| Material | Typical shrink ratio | Service temperature | Sizing note |
|---|---|---|---|
| Silicone heat shrink tubing | 2:1 | -50 °C to 200 °C | Stays flexible at low temperature, so a snug recovered fit does not crack; wall 0.5–2 mm |
| FEP heat shrink tubing | 1.6:1 or 2:1 | Shrinks at 175–200 °C | Lower ratio means tighter size steps; choose carefully because a 1.6:1 tube covers a narrow band |
| PTFE heat shrink | 2:1 | -200 °C to +260 °C | Shrink with a heat gun at 150–200 °C; high stiffness means generous clearance is needed when sliding on |
| PFA heat shrink tubing | 2:1 | High-temperature continuous duty | Better stress-crack resistance than FEP, so a tighter recovered fit is safe in chemical service |
| PTFE/FEP dual wall heat shrink tubing | 2:1 | Outer fluoropolymer wall, melt-flow inner liner | The adhesive liner fills gaps, so the recovered ID can be slightly larger than a plain tube |
Five Sizing Mistakes That Cause Loose or Split Tubing
1. Measuring the cable instead of the connector
The most common error. The tubing has to clear the largest feature, which on a terminated harness is the connector or lug, not the cable jacket.
2. Assuming the recovered ID equals the ratio
Wall thickness, material stiffness and the heating method all affect actual recovery. Use the datasheet recovered dimension, not a calculated one, for anything safety-related.
3. Sizing for a partial shrink
If you stop heating early the tube never reaches its quoted recovered ID, so it sits loose. Always size for full recovery and then heat to full recovery.
4. Ignoring shrink temperature when sizing
Silicone, PTFE and FEP shrink at different temperatures. If the shrink temperature is above what the component underneath can survive, you need a lower-temperature material — not a different size.
5. Over-shrinking onto sharp edges
A recovered ID much smaller than the substrate puts the tube under permanent hoop stress, which splits it along a sharp edge. Keep the recovered ID within the recommended band.
Technical Pre-Inquiry Checklist
If you are sending a sizing enquiry to a heat shrink tubing manufacturer or a heat shrinkable tubing manufacturer, these six values let the supplier quote the right part the first time instead of sending samples back and forth:
| What to specify | Why it matters |
|---|---|
| Largest diameter the tubing must pass over | Sets the minimum expanded ID |
| Smallest diameter it must seal onto | Sets the maximum recovered ID |
| Required shrink ratio | Determines whether one size can cover the range |
| Wall thickness after recovery | Drives abrasion and dielectric performance |
| Continuous service temperature and peak temperature | Selects silicone, PTFE, FEP or PFA |
| Cut length and annual volume | Determines whether standard reels or custom cut lengths are economic |
Frequently Asked Questions
How to Measure Heat Shrink Tubing
Measure the inside diameter of the tubing in its supplied state with a caliper — this is the expanded ID. Then check the recovered ID on the datasheet. Compare both against your component: expanded ID should be 20–30% larger than the widest point, recovered ID 10–20% smaller than the part it seals onto.
Is heat shrinkable tube size the same as the cable size?
No. Heat shrinkable tube sizes are quoted as tubing diameters, while cable is quoted as conductor cross-section or overall jacket diameter. Convert to overall jacket diameter first, then apply the clearance rule. For multi-core cable, use the bundle diameter including any filler and shield.
Can I use a 3:1 tube instead of a 2:1 tube?
Yes, and it is often the better choice. A 3:1 tube covers a wider size range and handles connectors and splices in one operation. The trade-off is a slightly thicker recovered wall for the same expanded size, which matters in tight routing.
What size heat shrink tubing do I need for a 2 inch cable?
For a 50.8 mm (2 inch) overall diameter you need a large diameter tube, typically 63–76 mm expanded ID at 2:1 so it can pass over the jacket and still recover with grip. Large diameter tubing should be sized at the lower end of the clearance range and heated with controlled airflow.
Are non-standard heat shrink sizes available?
Yes. Beyond the standard catalogue sizes, custom expanded and recovered diameters, wall thicknesses and cut lengths are produced to order. This is usually the better route when a standard size forces you into an oversized wall or a ratio you do not need.
If you have the two measurements from the checklist above, we can recommend the correct expanded ID, shrink ratio and wall thickness for your harness — and quote custom sizes where the standard chart does not fit. Send your dimensions, service temperature and annual volume to our engineering team or email intlsales@cngdg.com for a size recommendation and sample request.